
登月小車 AMB82 MINI AI 自駕車(二)資料蒐集:布置跑道並拍攝訓練照片
本系列使用 登月小車(AMB82 MINI),從硬體安裝、蒐集與標註資料、訓練 YOLOv7-tiny 模型,一路做到能辨識交通標誌的自駕小車。這是第二篇。
2-1. 場地準備
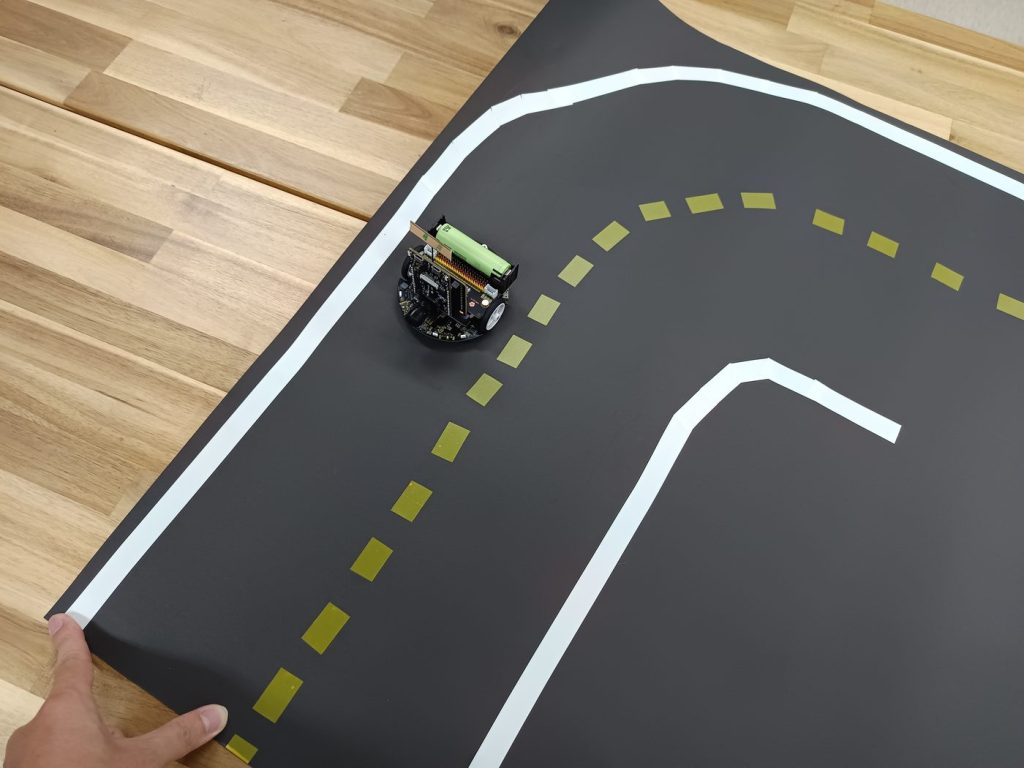
首先購買兩張黑色大壁報紙,或者現有的場地都可以,然後準備白色電工膠帶與黃色電工膠帶。然後如下圖依照小車寬度再寬一點的間距,用電工膠帶黏貼小車跑道。
白色電工膠帶做為外線,黃色電工膠帶以段落黏貼做為中線。
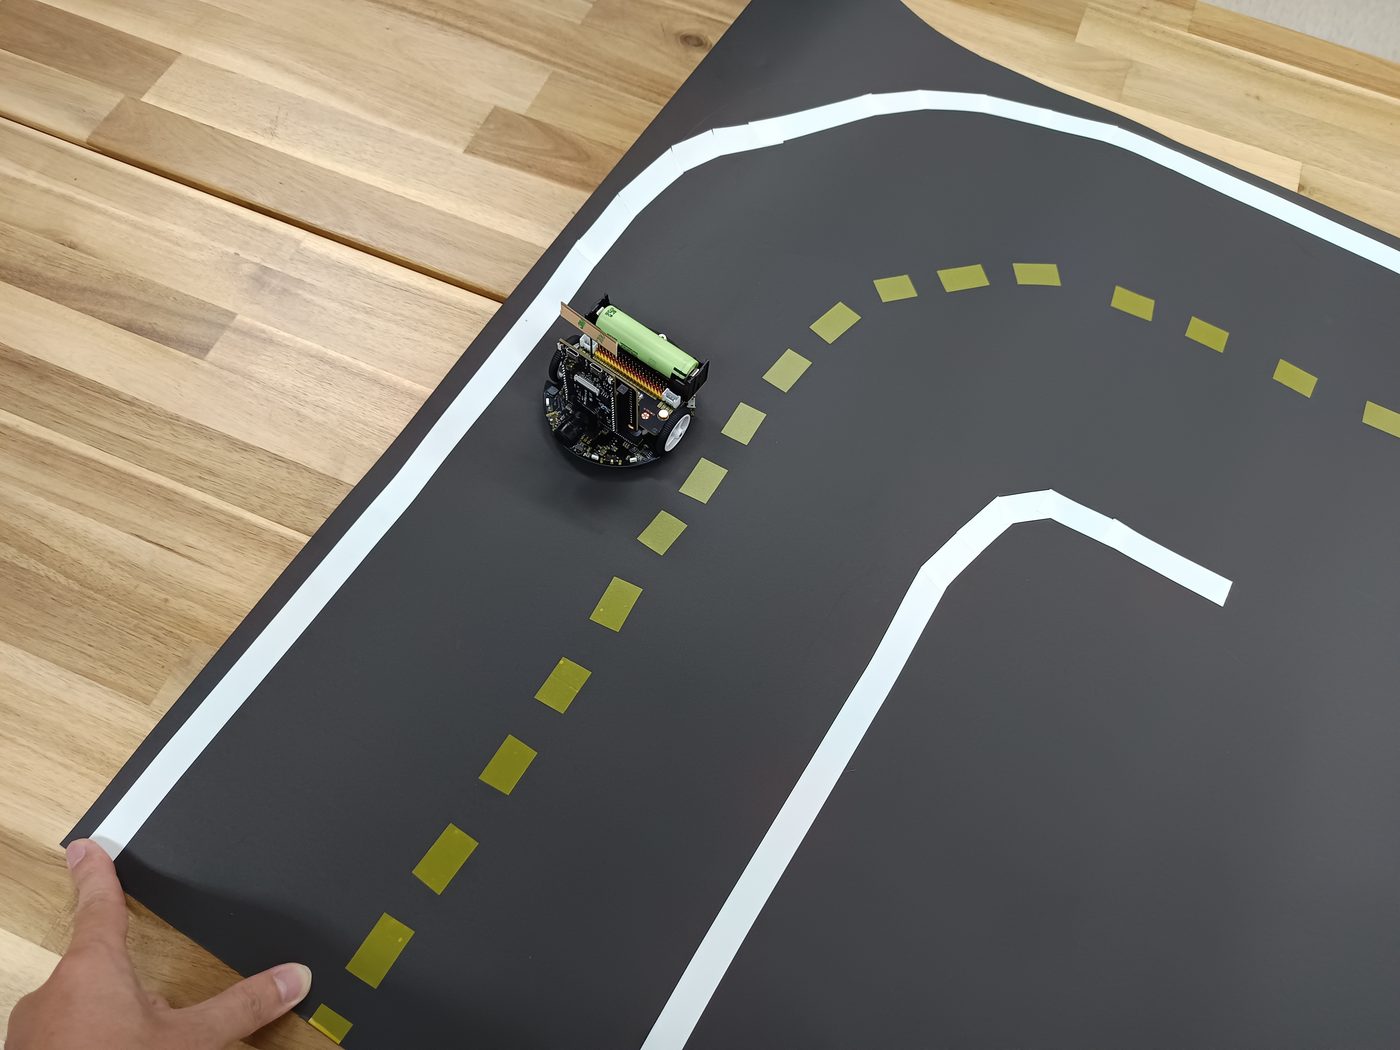
如果想以地板為場地也可以,可以把電工膠帶的顏色做替換,只要跟地板顏色區分開來,用什麼顏色都可以,只是外線和中線的顏色要不同。
接著準備標誌,你可以自己設計或是用我們提供的,PDF 連結如下:
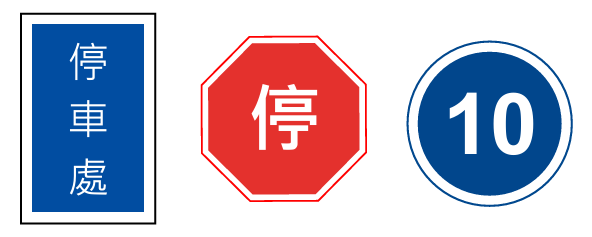
請彩色列印並裁剪下來,可以黏到任何能立起來的盒子或自己用紙板做立牌。
2-2. 程式撰寫
我們主要是想透過AI 模型,去分辨道路與標誌,讓小車可以沿著道路走,並依照標誌做反應。像是遇到停,希望它停車再開,遇到限速就減慢行駛速度……等。
為了讓AI 看得懂這些東西,我們需要告訴它什麼是道路,各個標誌代表什麼意思。所以我們需要用小車上的攝影機拍攝道路與標誌,並且將這些拍攝到的畫面儲存下來,之後我們會手動標註。
我們程式功能希望是這樣設計:
- 保留RTSP 串流讓我們可以知道小車現在拍攝到的畫面。
- 按下小車上面的按鈕後拍攝並自動儲存至SD Card。
- OLED 除了顯示IP 也要顯示目前拍攝的張數。
SD Card 除了作為之後存放模型之外,在此處兼具儲存照片。所以我們需要準備一張SD Card,大小約略在8GB ~ 32GB 即可,圖片大小與模型大小都不大。
程式重點說明如下:
宣告兩組 VideoSetting 物件,以符合一個作為RTSP 來源,另一個作為儲存照片來源。VIDEO_VGA 代表 640×480 解析度,兼顧傳輸速度與後續 YOLO 神經網路推論需求。configJPEG 的第四個參數設定為 1(snapshot = 1),代表此通道專門為「隨選單張畫格壓縮」優化。
Camera.videoInit() 會啟動底層視訊驅動與感光元件通訊。
VideoSetting configVID(VIDEO_VGA, CAM_FPS, VIDEO_H264, 0);
VideoSetting configJPEG(VIDEO_VGA, CAM_FPS, VIDEO_JPEG, 1);

configVID.setBitrate(2 * 1024 * 1024);
Camera.configVideoChannel(CHANNEL_VID, configVID);
Camera.configVideoChannel(CHANNEL_JPEG, configJPEG);
Camera.videoInit();
因為AMB82 在小車上是上下顛倒放,所以也需要將取得的畫面旋轉180 度才可以。CAMERA_ORIENTATION 設定為3,就是旋轉180 度的意思。
#define CAMERA_ORIENTATION 3

extern "C" {
    int isp_set_orientation(int val);
}

// 在 setup() 內執行:
if (CAMERA_ORIENTATION > 0) {
    isp_set_orientation(CAMERA_ORIENTATION);
}
我們以按鈕A 為拍照按鈕,當按下時會觸發captureAndSaveJPEG() 將當前影像擷取下來。
// #define BUTTON_PIN   18
int reading = digitalRead(BUTTON_PIN);

if (reading != lastButtonState) {
    lastDebounceTime = millis();
}

if ((millis() - lastDebounceTime) > debounceDelay) {
    if (reading != currentStableState) {
        currentStableState = reading;
        if (currentStableState == LOW) {
            captureAndSaveJPEG();
        }
    }
}
然後呼叫SD Card 將資料寫入,並安全移除,以釋放權限給下次儲存的時候。
if (fs.begin()) {
    char filename[64];
    while (true) {
        snprintf(filename, sizeof(filename), "%simg_%04d.jpg", fs.getRootPath(), fileCounter);
        if (!fs.exists(filename)) {
            break;
        }
        fileCounter++;
    }

    File file = fs.open(filename);
    if (file) {
        file.write((uint8_t *)img_addr, img_len);
        file.close();

        savedImageCount++;
        sdCardError = false;
        fileCounter++;
    } else {
        sdCardError = true;
    }

    fs.end();
} else {
    sdCardError = true;
}
完整程式如下:
記得輸入自己的Wi-Fi 名稱與密碼
#include "WiFi.h"
#include "StreamIO.h"
#include "VideoStream.h"
#include "RTSP.h"
#include "AmebaFatFS.h"
#include "VideoStreamOverlay.h"
#include <Wire.h>
#include <Adafruit_OLED_libraries/Adafruit_GFX.h>
#include <Adafruit_OLED_libraries/Adafruit_SSD1306.h>

#define BUTTON_PIN   18
#define CHANNEL_VID  0
#define CHANNEL_JPEG 1

#define SCREEN_WIDTH  128
#define SCREEN_HEIGHT 64
#define OLED_RESET     -1
#define SCREEN_ADDRESS 0x3C
Adafruit_SSD1306 display(SCREEN_WIDTH, SCREEN_HEIGHT, &Wire, OLED_RESET);
bool oledFound = false;

#define CAMERA_ORIENTATION 3

#ifdef __cplusplus
extern "C" {
#endif
int isp_set_orientation(int val);
#ifdef __cplusplus
}
#endif

VideoSetting configVID(VIDEO_VGA, CAM_FPS, VIDEO_H264, 0);
VideoSetting configJPEG(VIDEO_VGA, CAM_FPS, VIDEO_JPEG, 1);

RTSP rtsp;
StreamIO videoStreamer(1, 1);
AmebaFatFS fs;

char ssid[] = "";  // 記得輸入自己的Wi-Fi 名稱
char pass[] = "";  // 記得輸入自己的Wi-Fi 密碼

int status = WL_IDLE_STATUS;

int lastButtonState = HIGH;
unsigned long lastDebounceTime = 0;
const unsigned long debounceDelay = 50;
static int currentStableState = HIGH;

int fileCounter = 1;
int savedImageCount = 0;
bool sdCardError = false;

void captureAndSaveJPEG();
void printInfo(void);
void updateOSD(void);
void updateOLED(void);

void setup()
{
    Serial.begin(115200);

    if (display.begin(SSD1306_SWITCHCAPVCC, SCREEN_ADDRESS)) {
        oledFound = true;
        display.clearDisplay();
        display.setTextSize(1);
        display.setTextColor(SSD1306_WHITE);
        display.setCursor(0, 0);
        display.println(F("AMB82-MINI Camera"));
        display.println(F("Connecting WiFi..."));
        display.display();
    } else {
        Serial.println(F("[WARNING] SSD1306 OLED allocation failed or not detected"));
    }

    pinMode(BUTTON_PIN, INPUT_PULLUP);

    Serial.println("\r\n[INFO] Initializing MicroSD Card...");
    if (fs.begin()) {
        sdCardError = false;
        Serial.println("[INFO] MicroSD Card initialized successfully.");

        while (true) {
            char filename[64];
            snprintf(filename, sizeof(filename), "%simg_%04d.jpg", fs.getRootPath(), fileCounter);
            if (fs.exists(filename)) {
                savedImageCount++;
                fileCounter++;
            } else {
                break;
            }
        }
        Serial.print("[INFO] Existing images found on SD: ");
        Serial.println(savedImageCount);
        fs.end();
    } else {
        sdCardError = true;
        Serial.println("[WARNING] MicroSD Card not detected! Please ensure a FAT32 card is inserted.");
    }

    while (status != WL_CONNECTED) {
        Serial.print("Attempting to connect to WPA SSID: ");
        Serial.println(ssid);
        status = WiFi.begin(ssid, pass);

        delay(2000);
    }

    configVID.setRotation(0);
    configJPEG.setRotation(0);

    configVID.setBitrate(2 * 1024 * 1024);
    Camera.configVideoChannel(CHANNEL_VID, configVID);
    Camera.configVideoChannel(CHANNEL_JPEG, configJPEG);
    Camera.videoInit();

    rtsp.configVideo(configVID);
    rtsp.begin();

    videoStreamer.registerInput(Camera.getStream(CHANNEL_VID));
    videoStreamer.registerOutput(rtsp);
    if (videoStreamer.begin() != 0) {
        Serial.println("[ERROR] StreamIO link start failed");
    }

    Camera.channelBegin(CHANNEL_VID);
    Camera.channelBegin(CHANNEL_JPEG);

    delay(500);
    if (CAMERA_ORIENTATION > 0) {
        isp_set_orientation(CAMERA_ORIENTATION);
    }

    OSD.configVideo(CHANNEL_VID, configVID);
    OSD.begin();

    delay(1000);
    printInfo();
    updateOSD();
    updateOLED();
}

void loop()
{
    int reading = digitalRead(BUTTON_PIN);

    if (reading != lastButtonState) {
        lastDebounceTime = millis();
    }

    if ((millis() - lastDebounceTime) > debounceDelay) {
        if (reading != currentStableState) {
            currentStableState = reading;
            if (currentStableState == LOW) {
                captureAndSaveJPEG();
            }
        }
    }

    lastButtonState = reading;
    delay(10);
}

void captureAndSaveJPEG()
{
    uint32_t img_addr = 0;
    uint32_t img_len = 0;

    Serial.println("\r\n[ACTION] Button pressed (Pin 18 = false)! Capturing 640x480 image...");

    Camera.getImage(CHANNEL_JPEG, &img_addr, &img_len);

    if (img_addr == 0 || img_len == 0) {
        Serial.println("[ERROR] Failed to capture JPEG frame from camera.");
        return;
    }

    if (fs.begin()) {
        char filename[64];

        while (true) {
            snprintf(filename, sizeof(filename), "%simg_%04d.jpg", fs.getRootPath(), fileCounter);
            if (!fs.exists(filename)) {
                break;
            }
            fileCounter++;
        }

        File file = fs.open(filename);
        if (file) {
            file.write((uint8_t *)img_addr, img_len);
            file.close();
            savedImageCount++;
            sdCardError = false;
            Serial.print("[SUCCESS] Image saved: ");
            Serial.print(filename);
            Serial.print(" (Resolution: 640x480, Size: ");
            Serial.print(img_len);
            Serial.println(" bytes)");
            fileCounter++;
        } else {
            sdCardError = true;
            Serial.println("[ERROR] Failed to open file for writing on SD card.");
        }

        fs.end();
    } else {
        sdCardError = true;
        Serial.println("[ERROR] SD card initialization failed. Please check SD card connection.");
    }

    updateOSD();
    updateOLED();
}

void updateOSD(void)
{
    OSD.createBitmap(CHANNEL_VID);

    char countStr[32];
    char sdStr[32];
    snprintf(countStr, sizeof(countStr), "Images: %d", savedImageCount);
    snprintf(sdStr, sizeof(sdStr), "SD: %s", sdCardError ? "ERROR" : "OK");

    uint32_t sdColor = sdCardError ? OSD_COLOR_RED : OSD_COLOR_GREEN;

    OSD.drawText(CHANNEL_VID, 16, 16, countStr, OSD_COLOR_CYAN);
    OSD.drawText(CHANNEL_VID, 16, 16 + OSD.getTextHeight(CHANNEL_VID) + 4, sdStr, sdColor);

    OSD.update(CHANNEL_VID);
}

void updateOLED(void)
{
    if (!oledFound) return;

    display.clearDisplay();
    display.setTextSize(1);
    display.setTextColor(SSD1306_WHITE);

    display.setCursor(0, 0);
    display.println(F("AMB82-MINI (640x480)"));
    display.drawFastHLine(0, 10, SCREEN_WIDTH, SSD1306_WHITE);

    display.setCursor(0, 14);
    display.print(F("IP: "));
    display.println(WiFi.localIP());

    display.setCursor(0, 26);
    display.print(F("RTSP Port: "));
    display.println(rtsp.getPort());

    display.setCursor(0, 38);
    display.print(F("SD: "));
    display.print(sdCardError ? F("ERROR") : F("OK"));
    display.print(F(" | Img: "));
    display.println(savedImageCount);

    display.setCursor(0, 52);
    display.println(F("Pin18: Press to Snap"));

    display.display();
}

void printInfo(void)
{
    Serial.println(" ");
    Serial.println("==============================================");
    Serial.println("- AMB82-MINI 640x480 RTSP & Dataset Capture  -");
    Serial.println("==============================================");
    Camera.printInfo();

    IPAddress ip = WiFi.localIP();

    Serial.println("- RTSP Streaming Info -");
    rtsp.printInfo(ip.get_address());
    Serial.print("Stream URL: rtsp://");
    Serial.print(ip);
    Serial.print(":");
    Serial.println(rtsp.getPort());
    Serial.println("----------------------------------------------");
    Serial.println("Capture Trigger: Press button (Pin 18 -> GND)");
    Serial.println("Images will be saved to SD Card as 640x480 JPEG");
    Serial.println("==============================================");
}
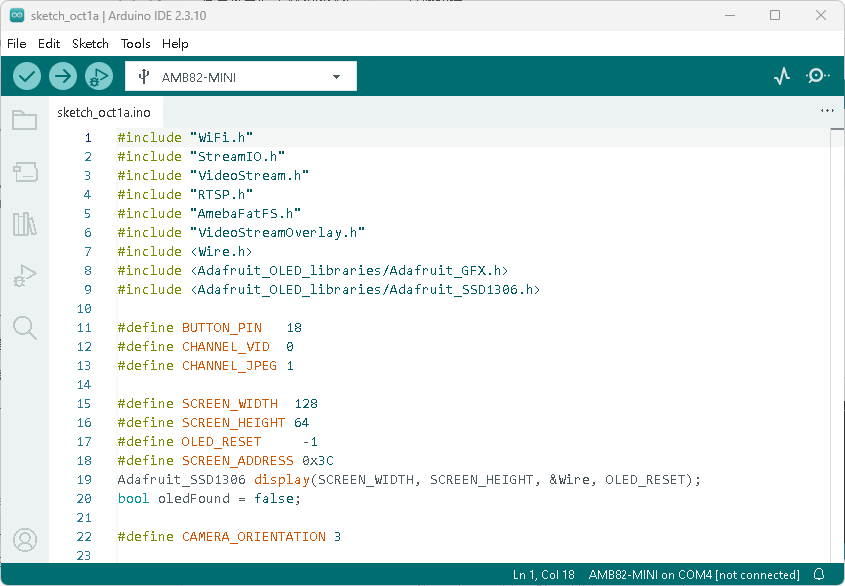
將完整程式碼複製到Arduino IDE,並下載到AMB82 MINI 上面。
2-3. 拍攝資料
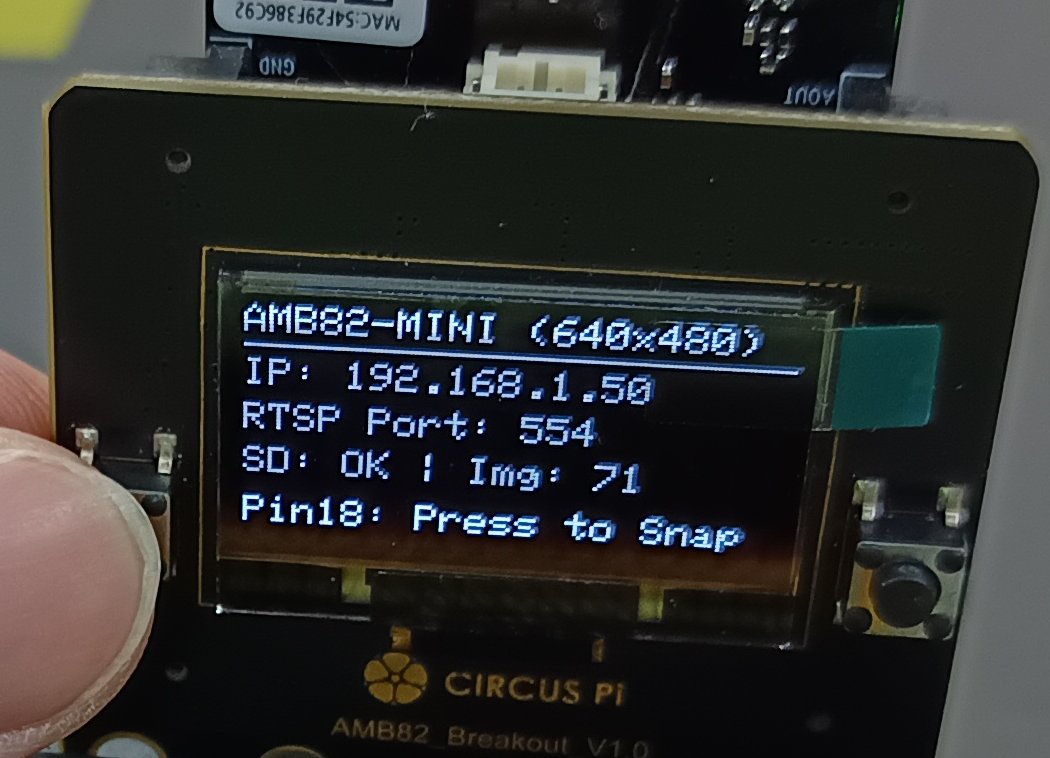
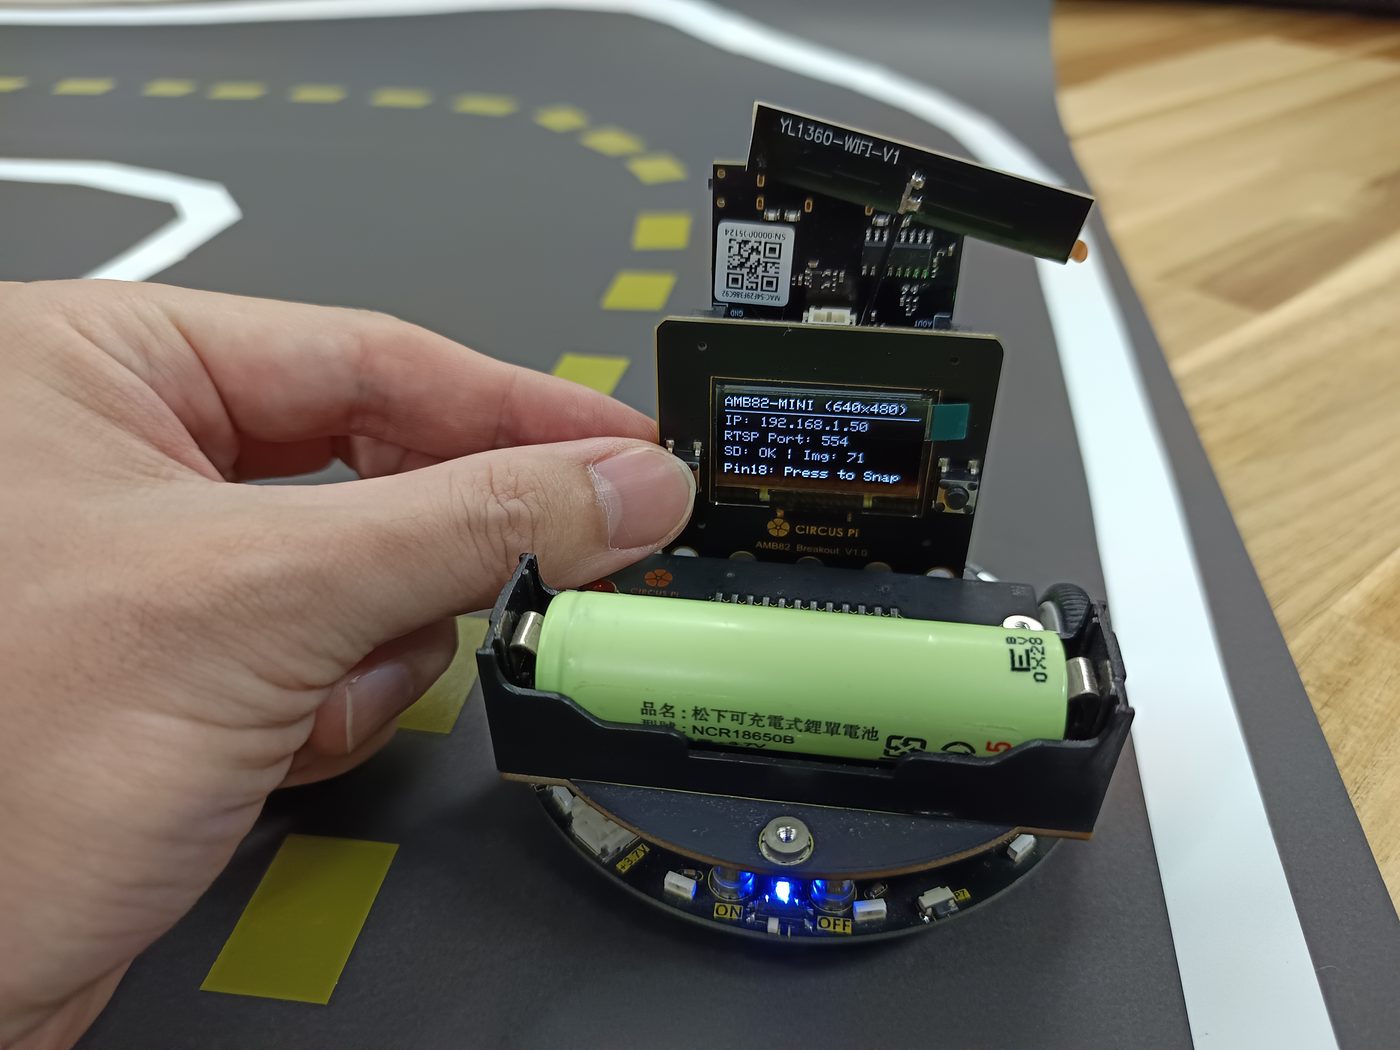
插上準備的SD Card 並將小車放在跑道上打開電源,OLED 會顯示目前連線資訊,最後會顯示 IP。以及SD Card 是否有安裝?還有目前儲存的照片(Img) 有幾張。
透過VLC 開啟串流影像,以方便拍攝目標。影像左上角也會顯示儲存資訊,照片數量與SD Card 是否正常運作。
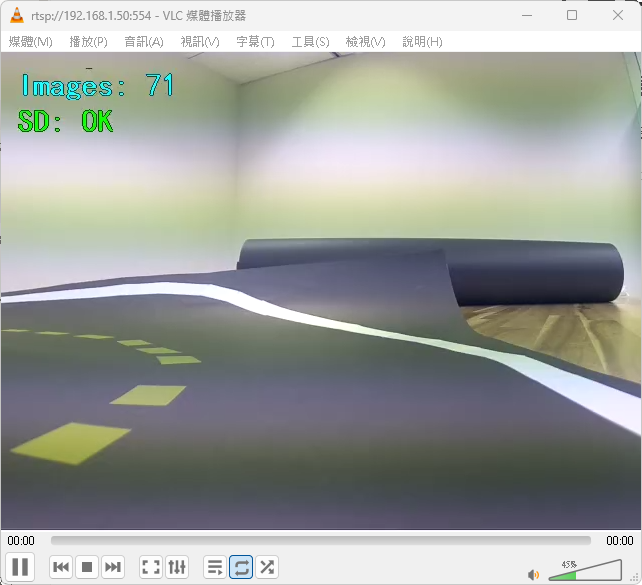
我們拍攝目標是取得道路上的黃色線段與標誌,線段要讓車子在道路上拍,標誌就沒有強制要擺在一起拍,可以分開沒關係。
請搭配VLC 查看畫面中是否有目標,確認無誤即可按下「按鈕 A」拍攝照片。
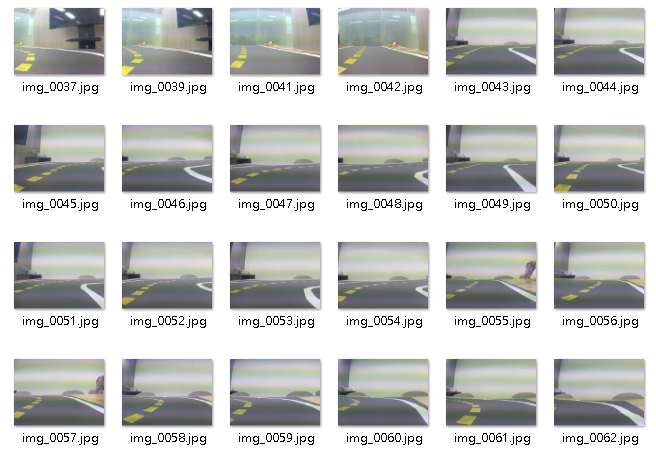
然後請讓車子擺在不同角度與不同位置,像是放在直線或是彎道處,或是刻意讓它偏離一點跑道。盡可能蒐集不同的畫面,讓AI 能學習到各種情況。
標誌建議部分照片是全部放一起拍,有些則是單獨一個標誌拍攝,儘量增加不同背景或角度和位置,畢竟小車在移動時不會都是拍到正面的標誌。
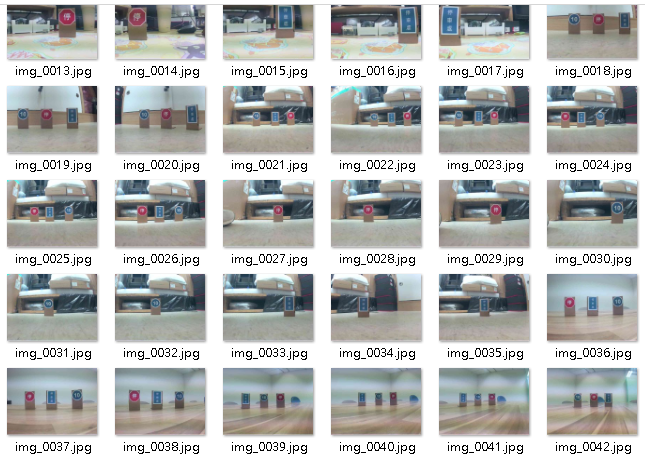
數據多樣性與數量能多少張就多少張,但為了避免大家標注資料時頭昏眼花,建議道路與標誌各拍攝約50 ~ 100 張左右即可,前提是每張資料都要是獨一無二。
拍攝完畢後就能關閉小車電源,然後拔出SD Card,請記得關閉電源再拔,非常重要!!!
然後用讀卡機放到自己的電腦上,除了再檢查一次照片之外,也順便剔除模糊的照片。
總結
這個單元主要就是用AMB82 MINI 拍攝訓練AI 用的資料,請確實蒐集每張照片。下個單元將會教同學如何做資料標註,這將是一項大工程!
系列文章
- (一)基礎認識
- (二)資料蒐集(本篇)
- (三)資料標註
- (四)訓練模型與轉換
- (五)自動駕駛