
Infrared Thermometer Gun
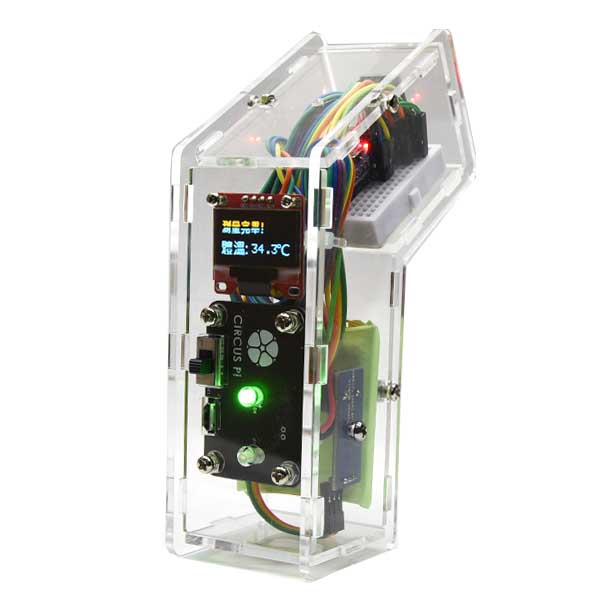
The infrared thermometer gun uses an MLX90615 non-contact infrared sensor and an OLED display. Students assemble it and write the code themselves to build a thermometer that shows body or object temperature.
What this kit teaches
Meet the thermometer and DIY assembly
Introduction to the UBUNO pro mini, button, OLED display, and non-contact infrared thermometer; connecting them together; and assembling the acrylic case.
Installing drivers and setting up the sensing program
Program libraries, USB driver, sensing principle, measurement program, and calibration program.
Thermometer OLED display graphics
Setting the graphic size and resolution; web link for converting images to bitmaps.
Course outline
01 Getting to know the thermometer
Unit content
- Introduction to the UBUNO pro mini, button, OLED display, and non-contact infrared thermometer
Matching materials:CIRCUS Pi course outline “UBUNOpro-mini-DIY Thermometer,” Unit 1
02 DIY assembly
Unit content
- Connecting the UBUNO pro mini, button, OLED display, and non-contact infrared thermometer
- Assembling the acrylic case
Matching materials:CIRCUS Pi course outline “UBUNOpro-mini-DIY Thermometer,” Unit 2
03 Installing drivers
Unit content
- Program libraries
- USB driver
Matching materials:CIRCUS Pi course outline “UBUNOpro-mini-DIY Thermometer,” Unit 3
04 Setting up the sensing program
Unit content
- Sensing principle
- Measurement program
- Calibration program
Matching materials:CIRCUS Pi course outline “UBUNOpro-mini-DIY Thermometer,” Unit 4
05 Thermometer OLED display graphics
Unit content
- Setting the graphic size and resolution
- Web link for converting images to bitmaps
Matching materials:CIRCUS Pi course outline “UBUNOpro-mini-DIY Thermometer,” Unit 5
This course outline follows the official CIRCUS Pi course outline. Please contact us for class period counts, which vary with each school’s schedule.
Product features
The Arduino infrared thermometer gun uses an MLX90615 non-contact infrared temperature sensor. The sensor temperature range is -40 to 85 °C and the object temperature range is -40 to 115 °C, with 0.5 °C accuracy within those ranges.
It includes a buzzer for alerts and a 0.96-inch OLED display.
A rechargeable power board with a switch: connect a Micro USB cable to charge the battery without removing the battery or the case.
Clear acrylic case: once assembled, you can see the circuits and components inside, giving it a distinctive maker-style look.
Hardware specifications
| Main board | UBUNO pro mini |
| Display | 0.96-inch OLED display, 128 × 64, blue (I2C interface) |
| Sensor | MLX90615 |
| Audio | Buzzer module |
| Power board | LipoPower V1.0 |
| Battery | Lithium polymer battery, 850 mAh, 3.7 V |
| Case | Clear acrylic (3 mm) |
Contact us
Your message goes straight to our team, and we usually reply within one business day.
- 01Questions? Send us a message or add us on LINE.
- 02Quotes and orders, including international shipping
- 03Teacher training and professional development
Scan with your phone to add us on LINE.
Add us on LINE