
Pixel:Bit Development Board
Pixel:Bit combines dual ESP32 and ATmega328P controllers with a 5-megapixel camera module, and can be used for edge computing projects such as video streaming, face recognition, and TinyML image recognition.
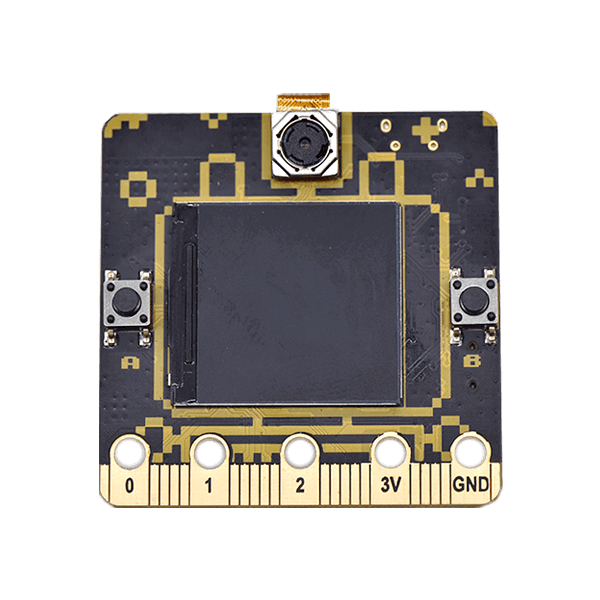
What this kit teaches
A better choice than the ESP32 CAM
What Pixel:Bit is, what makes it unique, the spec sheet, the pin mapping diagram, environment setup, and writing code.
Image recognition with Edge Impulse (Part 1): data collection
What TinyML is, AI applications in image recognition, image classification with Edge Impulse, model training, model testing, and model deployment.
Image-recognition robotic arm
Planning the workflow, confirming the goal, training the model, building a simulated test area, code walkthrough, and architecture.
Course outline
01 A better choice than the ESP32 CAM (1 class period)
Unit contents
- What is Pixel:Bit?
- What makes it unique
- Spec sheet
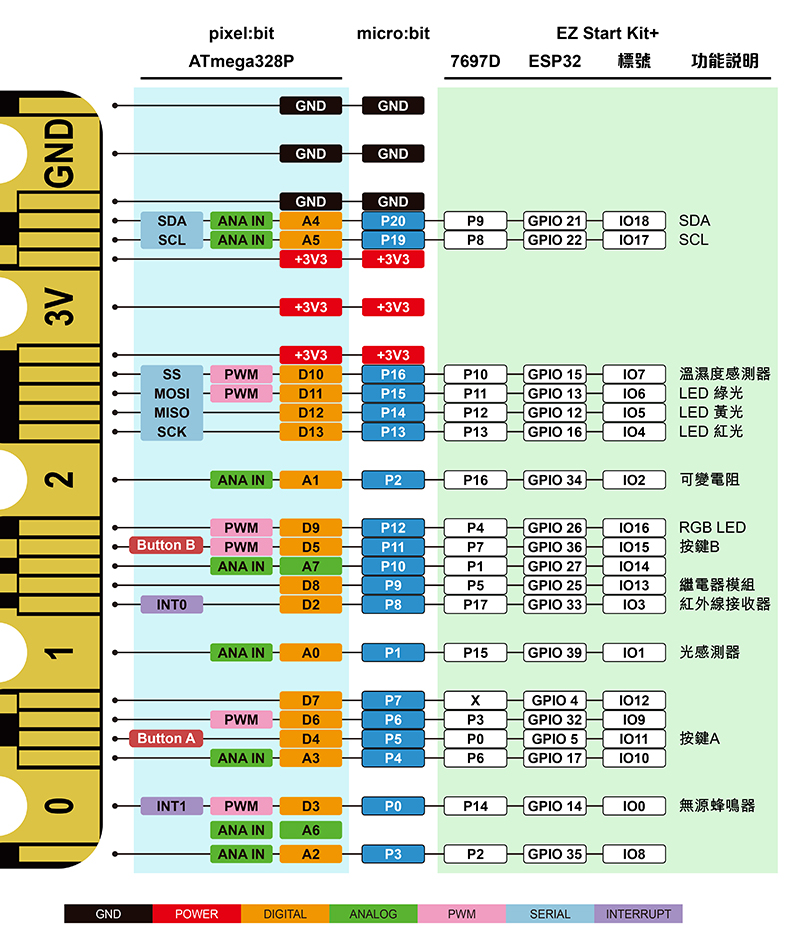
- Pin mapping diagram
Related article: Pixel:Bit tutorial (1)—A better choice than the ESP32 CAM
02 UART communication between the ESP32 and ATmega328P (2 class periods)
Unit contents
- Environment setup
- Writing code
- Advanced coding
Related article: Pixel:Bit tutorial (2)—UART communication between the ESP32 and ATmega328P
03 Step-by-step Camera Web Server camera application (2 class periods)
Unit contents
- Streaming and capturing images (Stream and Capture)
Related article: Pixel:Bit tutorial (3)—Step-by-step Camera Web Server camera application
04 How to stream video to a TFT display (1 class period)
Learning objectives
The goal of this application is to stream the captured video to a TFT screen with almost no delay.
Unit contents
- Hardware architecture
- Operating instructions
Related article: Pixel:Bit tutorial (4)—How to stream video to a TFT display
05 Image recognition with Edge Impulse (Part 1): data collection (2 class periods)
Unit contents
- What is TinyML?
- AI applications in image recognition
- Image classification with Edge Impulse
Related article: Pixel:Bit tutorial (5)—Image recognition with Edge Impulse (Part 1): data collection
06 Image recognition with Edge Impulse (Part 2): model training and use (2 class periods)
Unit contents
- Model training
- Model testing
- Model deployment
Related article: Pixel:Bit tutorial (6)—Image recognition with Edge Impulse (Part 2): model training and use
07 FPV Car: first-person-view phone-controlled car (2 class periods)
Unit contents
- Example demo
- Code walkthrough
Related article: Pixel:Bit tutorial (7)—FPV Car: first-person-view phone-controlled car
08 Playing the Dino Game together (2 class periods)
Unit contents
- Generating the pattern
- Code walkthrough
Related article: Pixel:Bit tutorial (8)—Playing the Dino Game together
09 Image-recognition robotic arm (2 class periods)
Unit contents
- Planning the workflow
- Confirming the goal
- Training the model
- Building a simulated test area
- Code walkthrough
Related article: Pixel:Bit tutorial (9)—Image-recognition robotic arm
10 Integrating LINE Notify for instant photo notifications (1 class period)
Learning objectives
The goal of this hands-on tutorial is an automatic camera. After the PIR infrared motion sensor detects a person moving, it lights the WS2812 LED (white) on the MbitBot mini expansion board and sounds the note Si on the buzzer. It then takes a photo with the camera, sends the image to the LINE Notify server over HTTPS, and finally saves the image to the SD card.
Unit contents
- Architecture
- Getting a Line Notify token
- Installing the library
- Example code for ESP32
- Example code for ATmega328P
Related article: Pixel:Bit tutorial (10)—Integrating LINE Notify for instant photo notifications
11 Integrating Azure Custom Vision to build Edge AI (1 class period)
Unit contents
- Planning the workflow
- Installing the Arduino library
- Editing the configuration file
- Code walkthrough
- Verification
Related article: Pixel:Bit tutorial (11)—Integrating Azure Custom Vision to build Edge AI
This course outline is based on existing CIRCUS Pi tutorial articles. Class period counts are estimates and can be adjusted for your class.
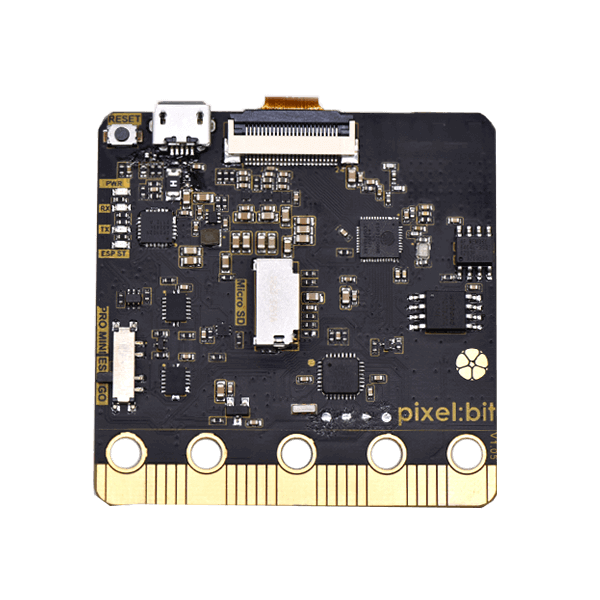
Hardware specifications
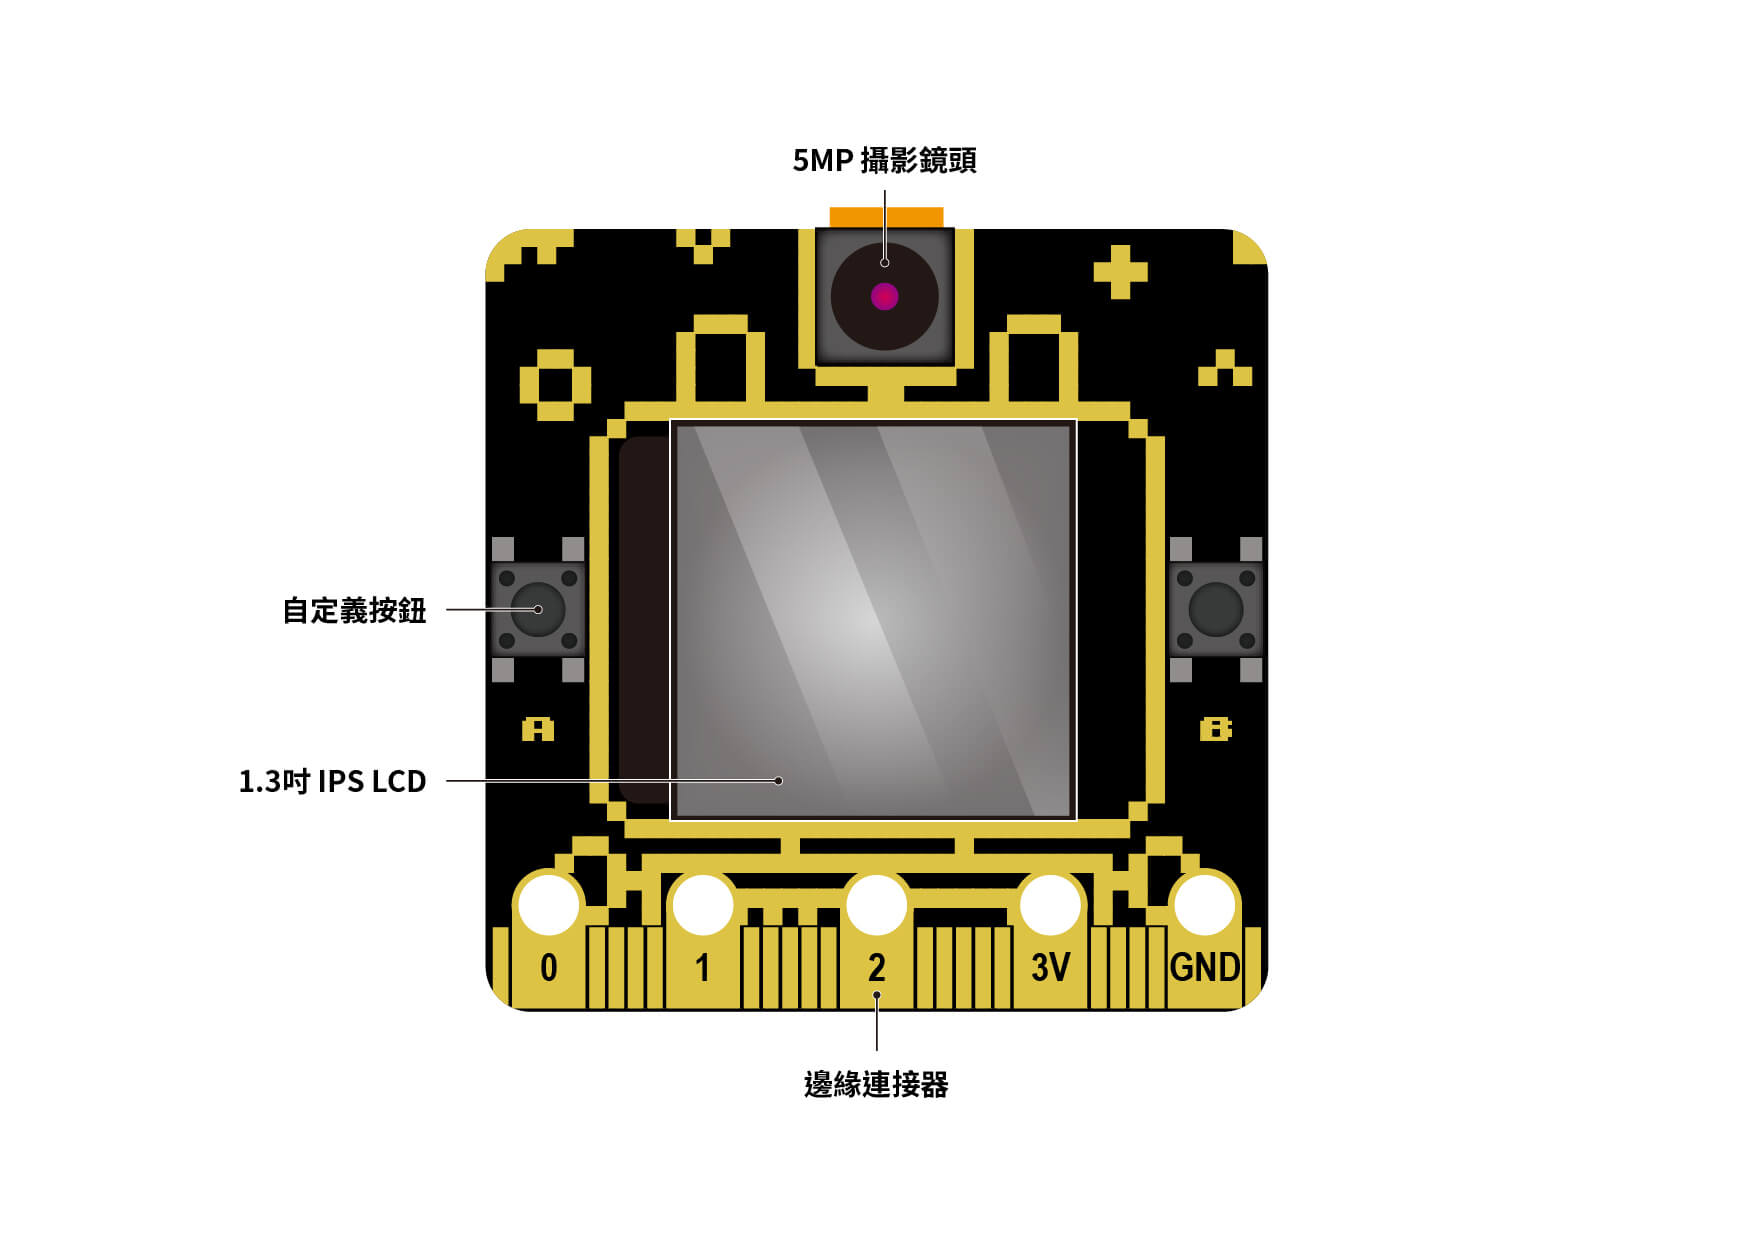
Pixel:Bit, front
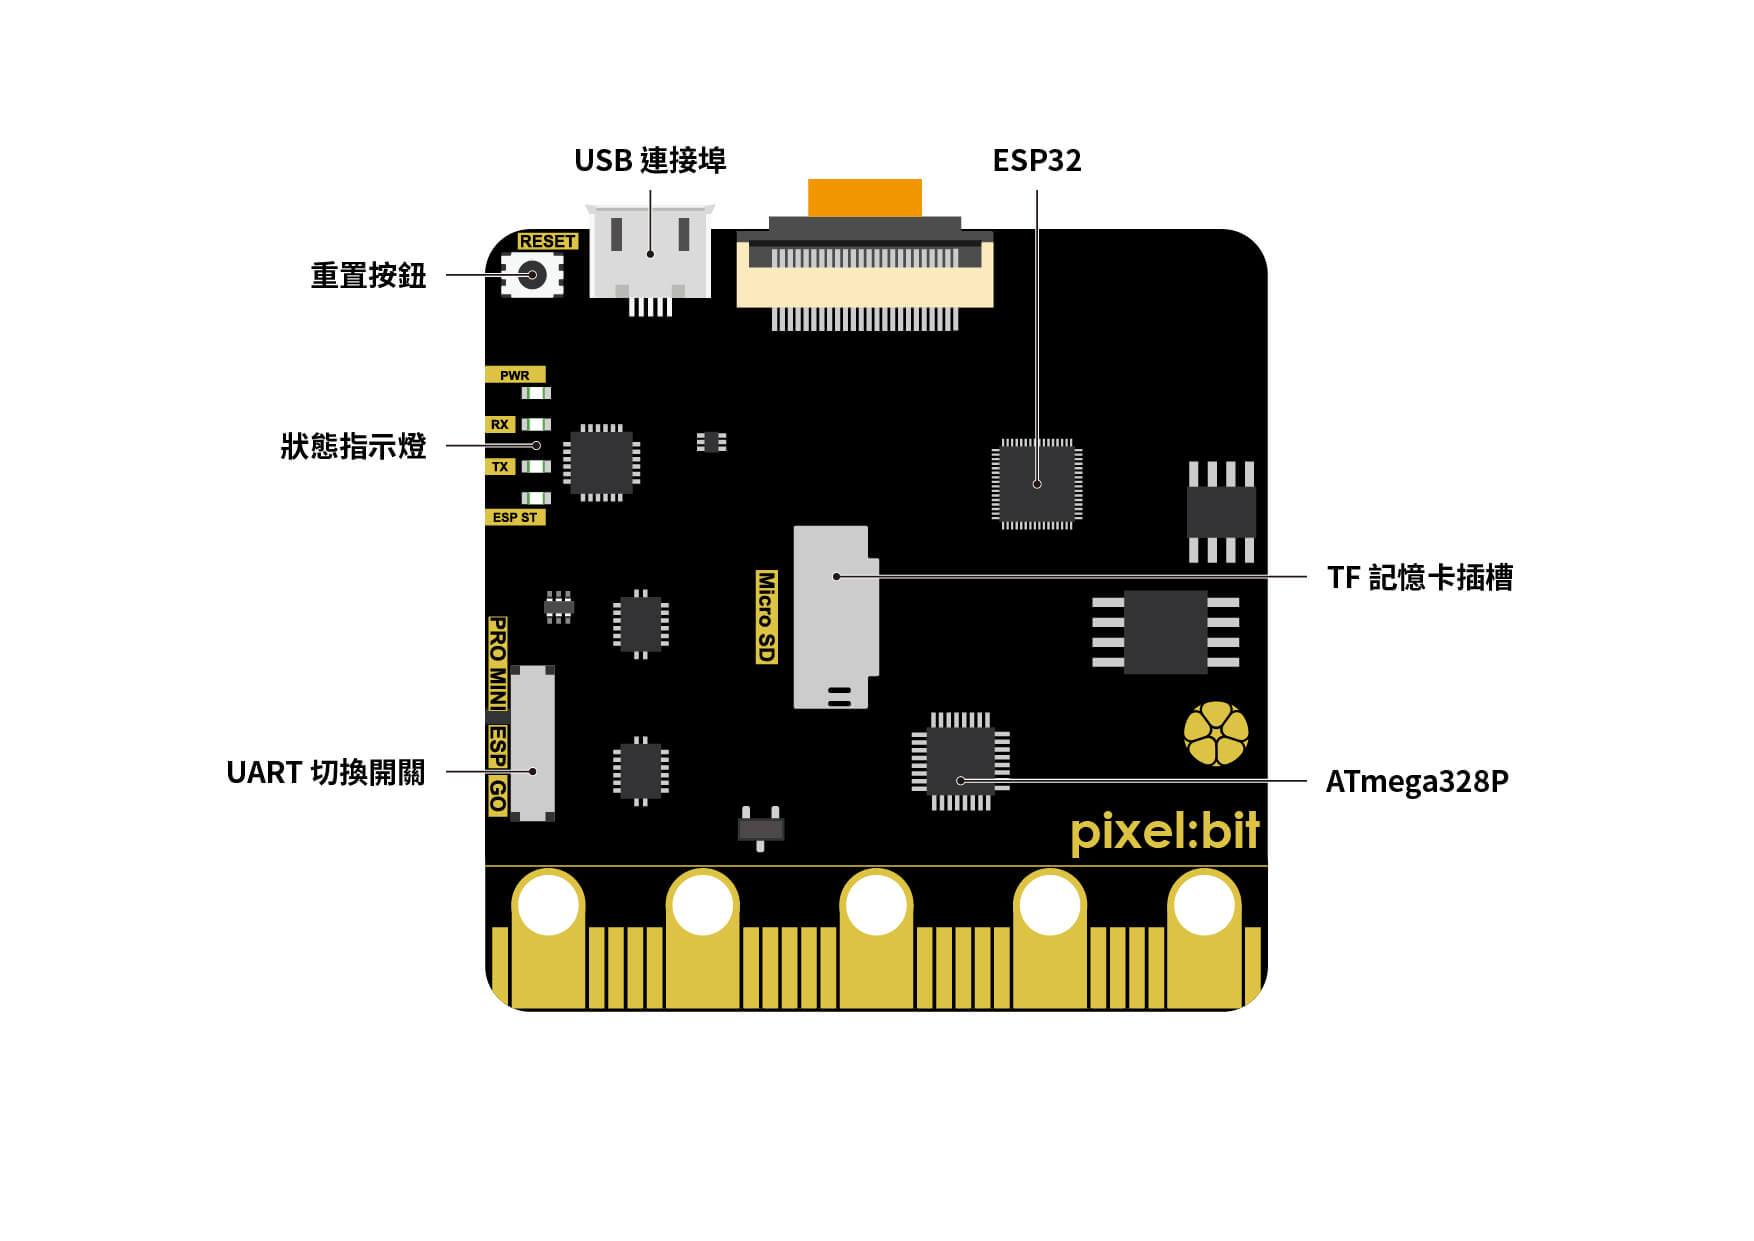
Pixel:Bit, back
| Microcontroller | Visual part: ESP32 GPIO part: ATmega328P | ||
| Clock speed | 240 MHz (ESP32) 8 MHz (ATmega328P) | ||
| Input voltage | 3.3 V (I/O), 5 V (Micro USB) | ||
| Operating voltage | 3.3 V | Custom buttons | 2 |
| SD card expansion | Yes | UART switch | Yes |
| External interrupt pins | 2 | PWM pins | 6 |
| Analog input pins | 8 | Digital I/O pins | 18 |
| UART | 1 | I2C | 1 |
| SPI | 1 | I/O output DC current | 40 mA |
| Camera module | OV5640 (5.0 MP camera) | ||
| Display | 1.3-inch IPS LCD (240 × 240) | ||
| Dimensions | 51.49 mm × 51.50 mm (PCB) |
Product features
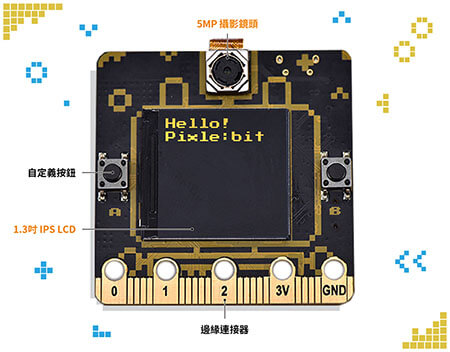
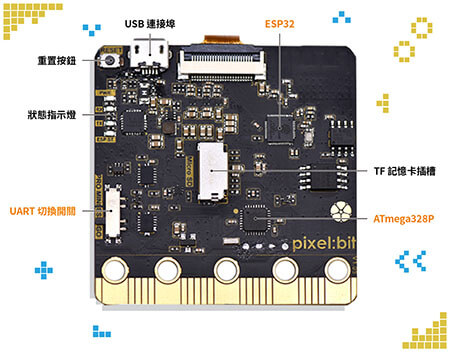
- 5-megapixel OV5640 camera module for capturing video and collecting image data.
- 1.3-inch color IPS LCD with a resolution of 240 × 240, used to display text and the image captured by the camera.
- UART switch with three modes: PRO MINI, ESP, and GO.
- Dual controllers (ESP32 and ATmega328P) divide the work, with the ESP32 handling video and the ATmega328P handling GPIO control.
Pixel:Bit applications
| ▲ Camera Web Server camera application: Pixel:Bit video streaming | ▲ Camera Web Server camera application: face recognition |
| ▲ Dino Game | ▲ Image-recognition robotic arm |
| ▲ Generating a QR code for quick Wi-Fi connection | ▲ FPV Car: first-person-view phone-controlled car |
| ▲ Integrating LINE Notify for instant photo notifications |
Related teaching resources
Teacher Huang Wenyu—Ayu’s Teaching Site—Pixel:Bit
Video
Contact us
Your message goes straight to our team, and we usually reply within one business day.
- 01Questions? Send us a message or add us on LINE.
- 02Quotes and orders, including international shipping
- 03Teacher training and professional development

Scan with your phone to add us on LINE.
Add us on LINE